Capture workflow
The capture workflow walks you through photographing the pole, adding optional data, and collecting its exact GNSS position for accurate measurements in Azmyth.
1. Capture a node photo
Once your equipment is connected, you're ready to capture your first node (pole, fire hydrant, manhole, etc.).
Photo Capture Steps
- Walk to the pole (or other node) you plan to collect.
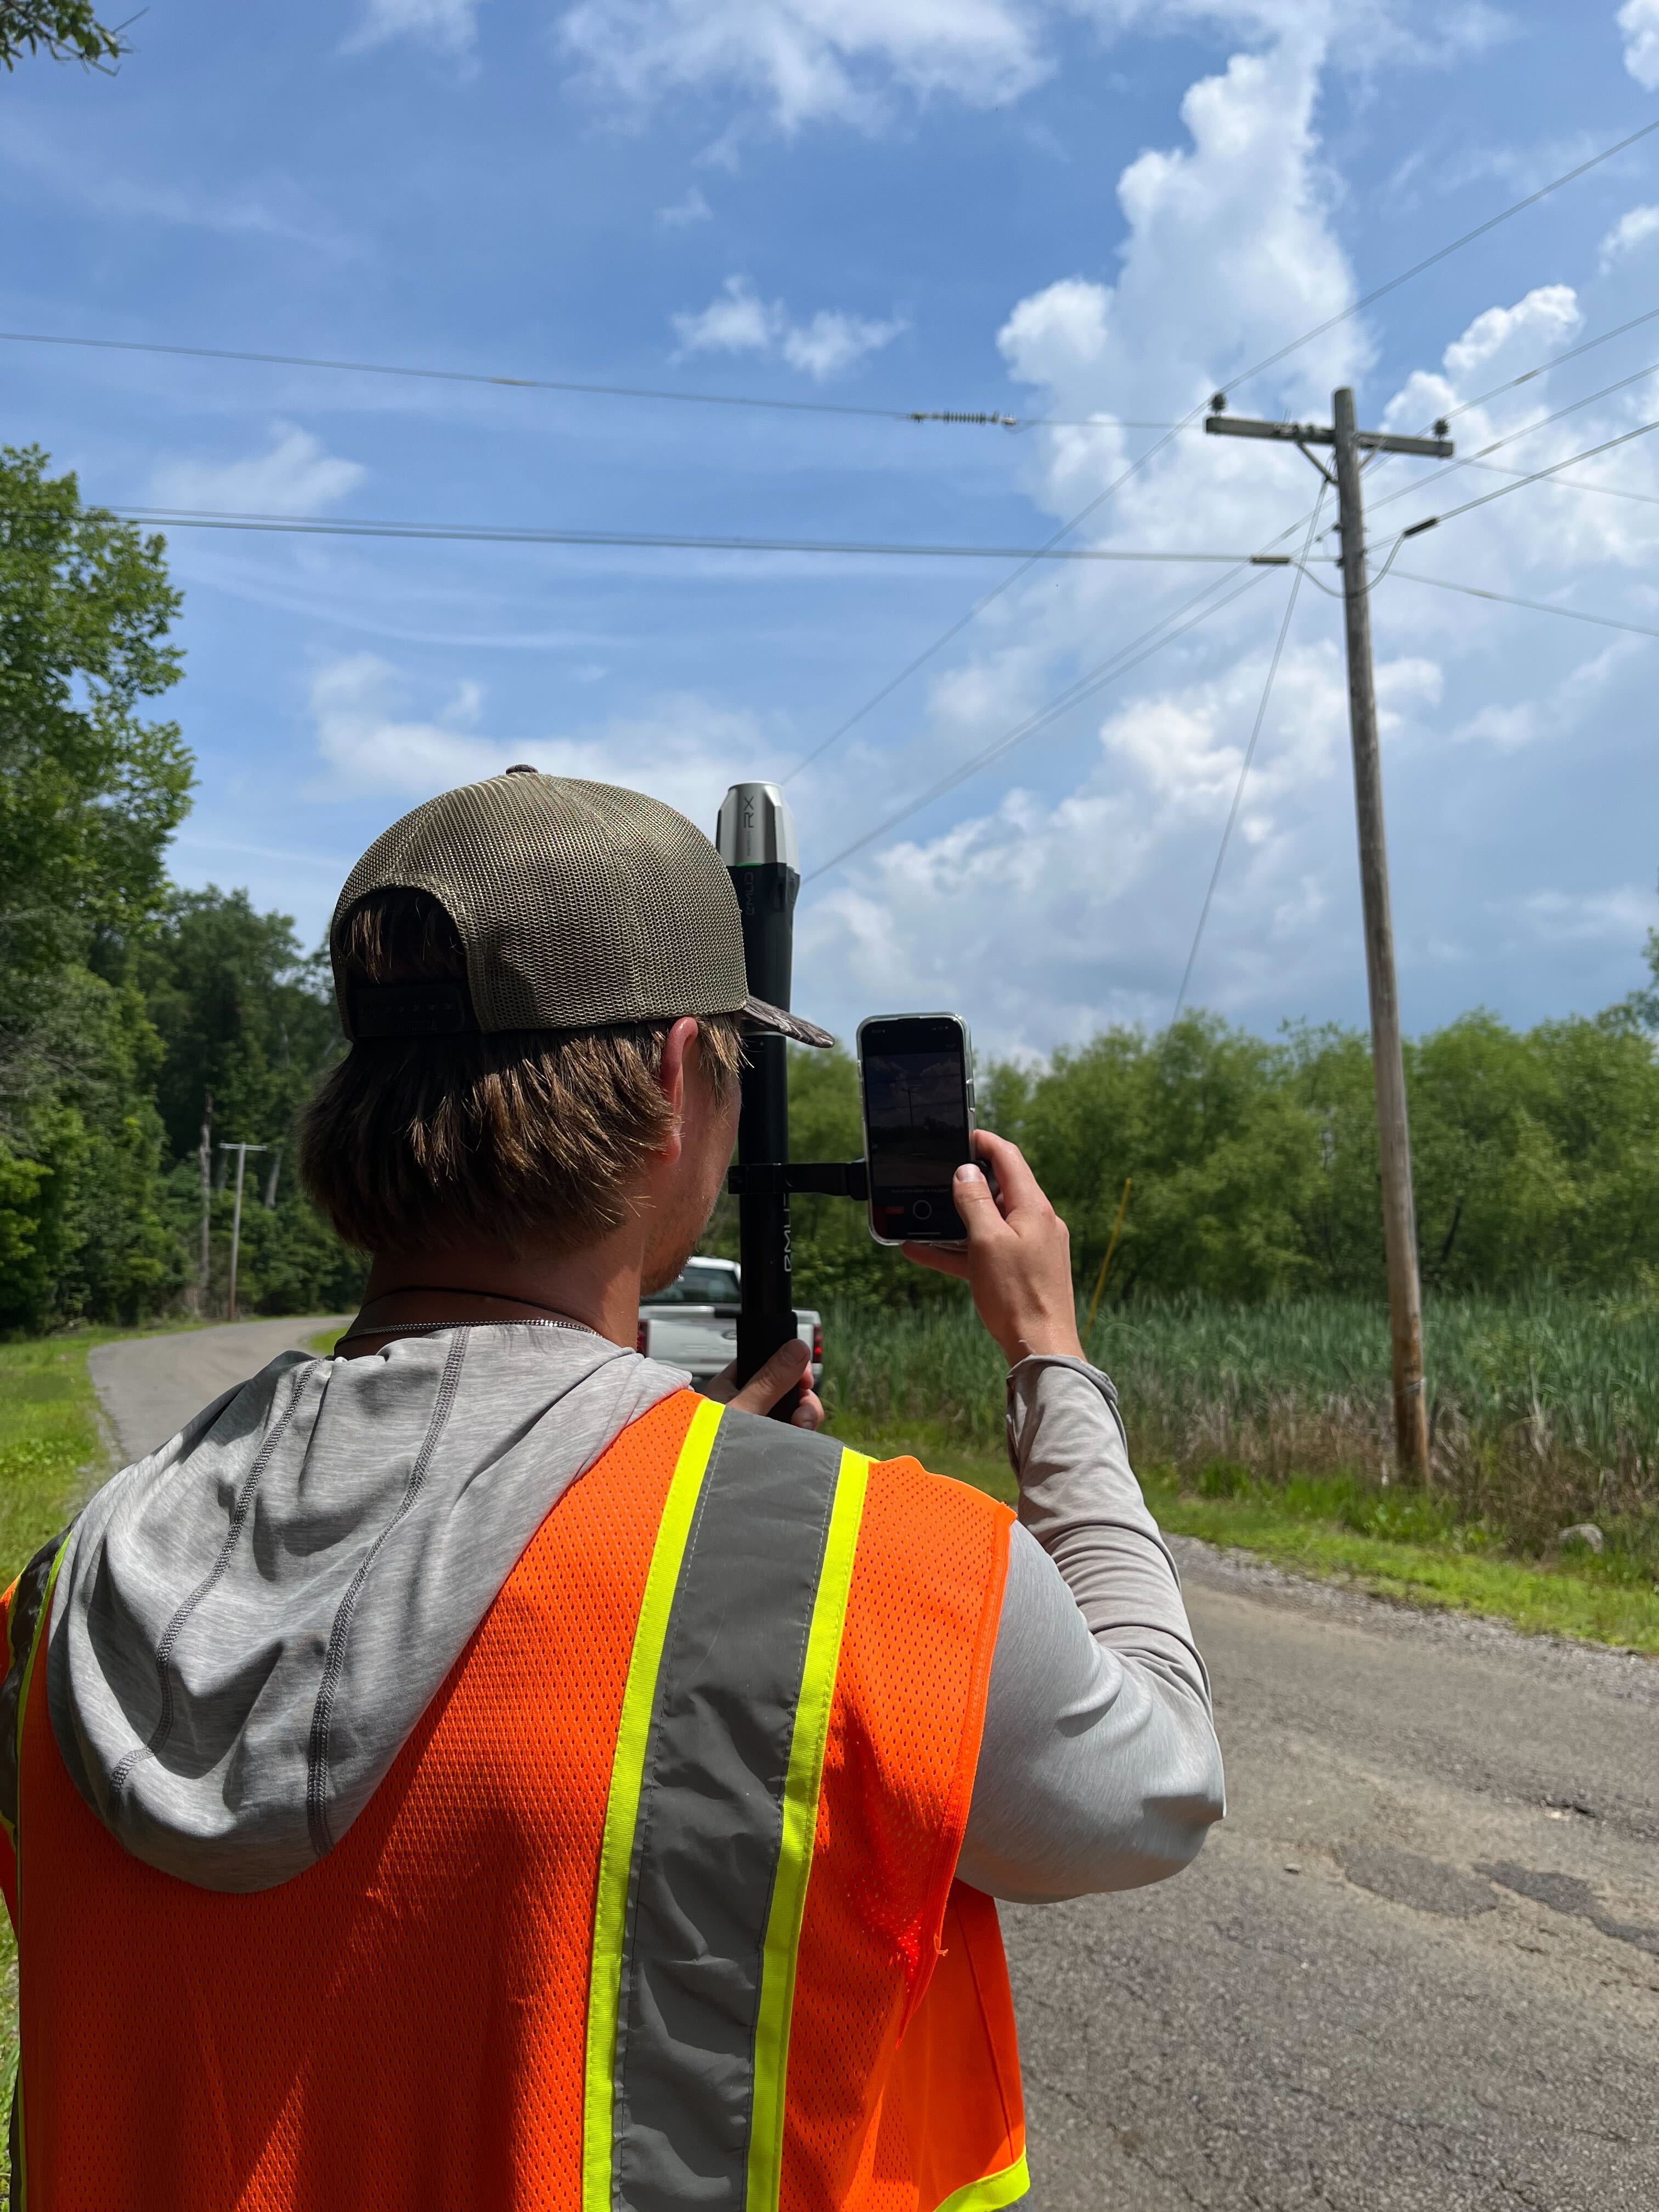
- Position yourself at a distance where the entire pole is visible in the frame—typically 20–40 ft depending on height and terrain.
- In the Azmyth on Foot app, tap “Capture Photo.”
- Align the node using the on-screen crosshairs:
- Hold the phone straight up and down with minimal tilt.
- Center the pole as accurately as possible.
- If you are collecting an object other than a pole, position it within the crosshairs if possible.
- Avoid capturing at sharp angles or extreme up/down tilt.
- Take the photo.
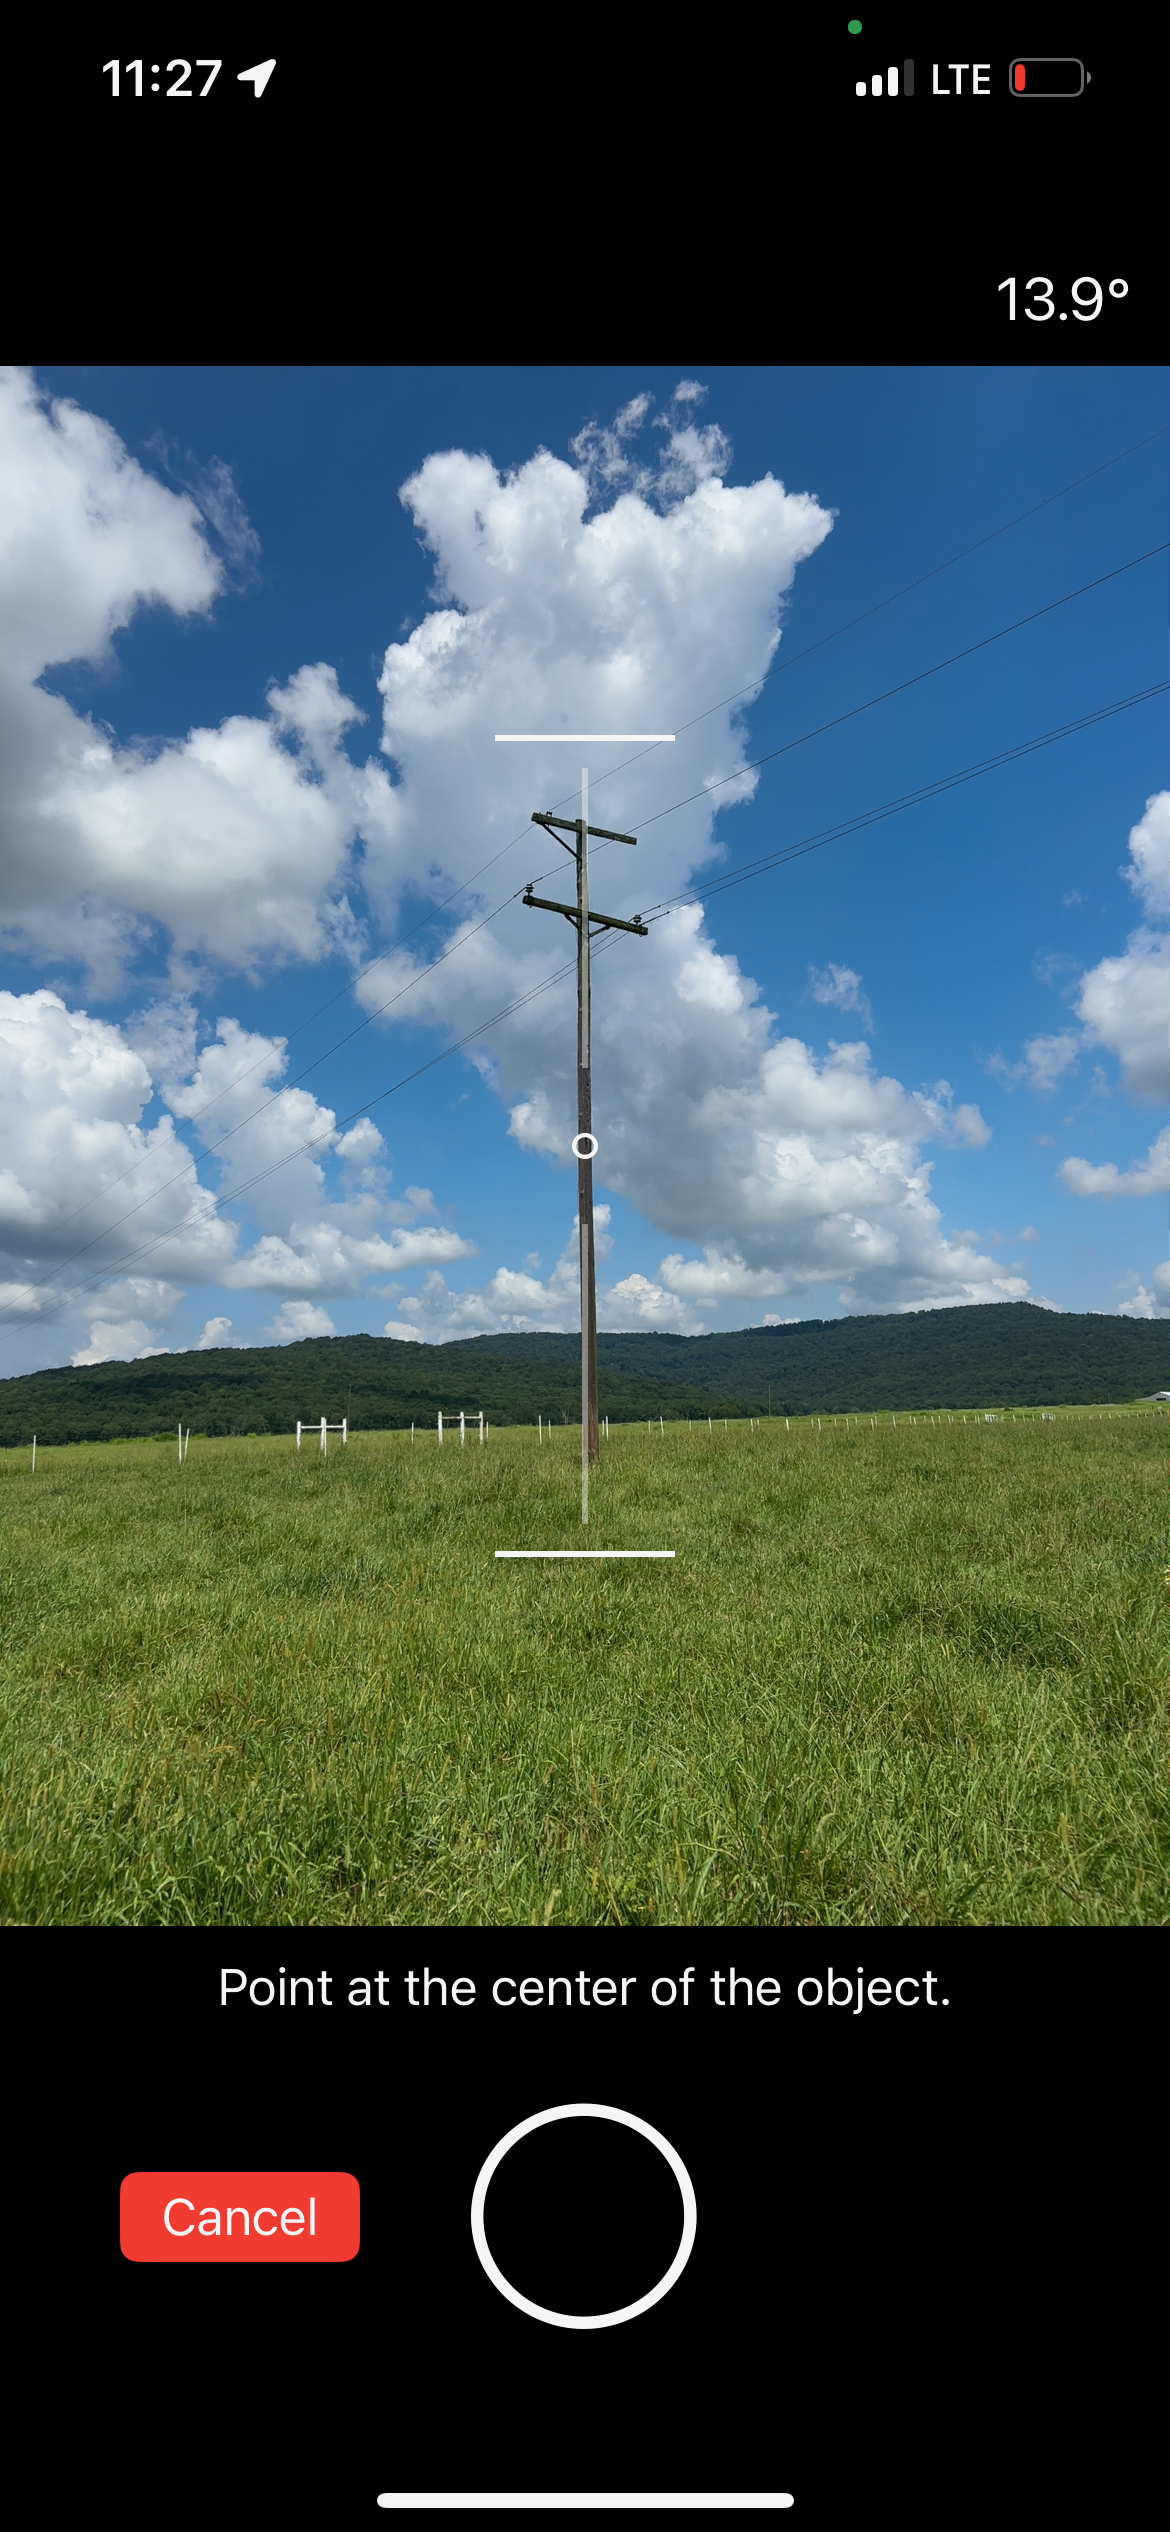
Photo Best Practices (Optional but Helpful)
- Keep the pole vertically centered in the frame.
- If the pole has equipment mounted only on one side, capture from the clearest angle.
- Avoid capturing during heavy backlighting if possible.
- Watch for obstructions (trees, vehicles, plants blocking the pole face).
2. Add Supplemental Data (Optional but Recommended)
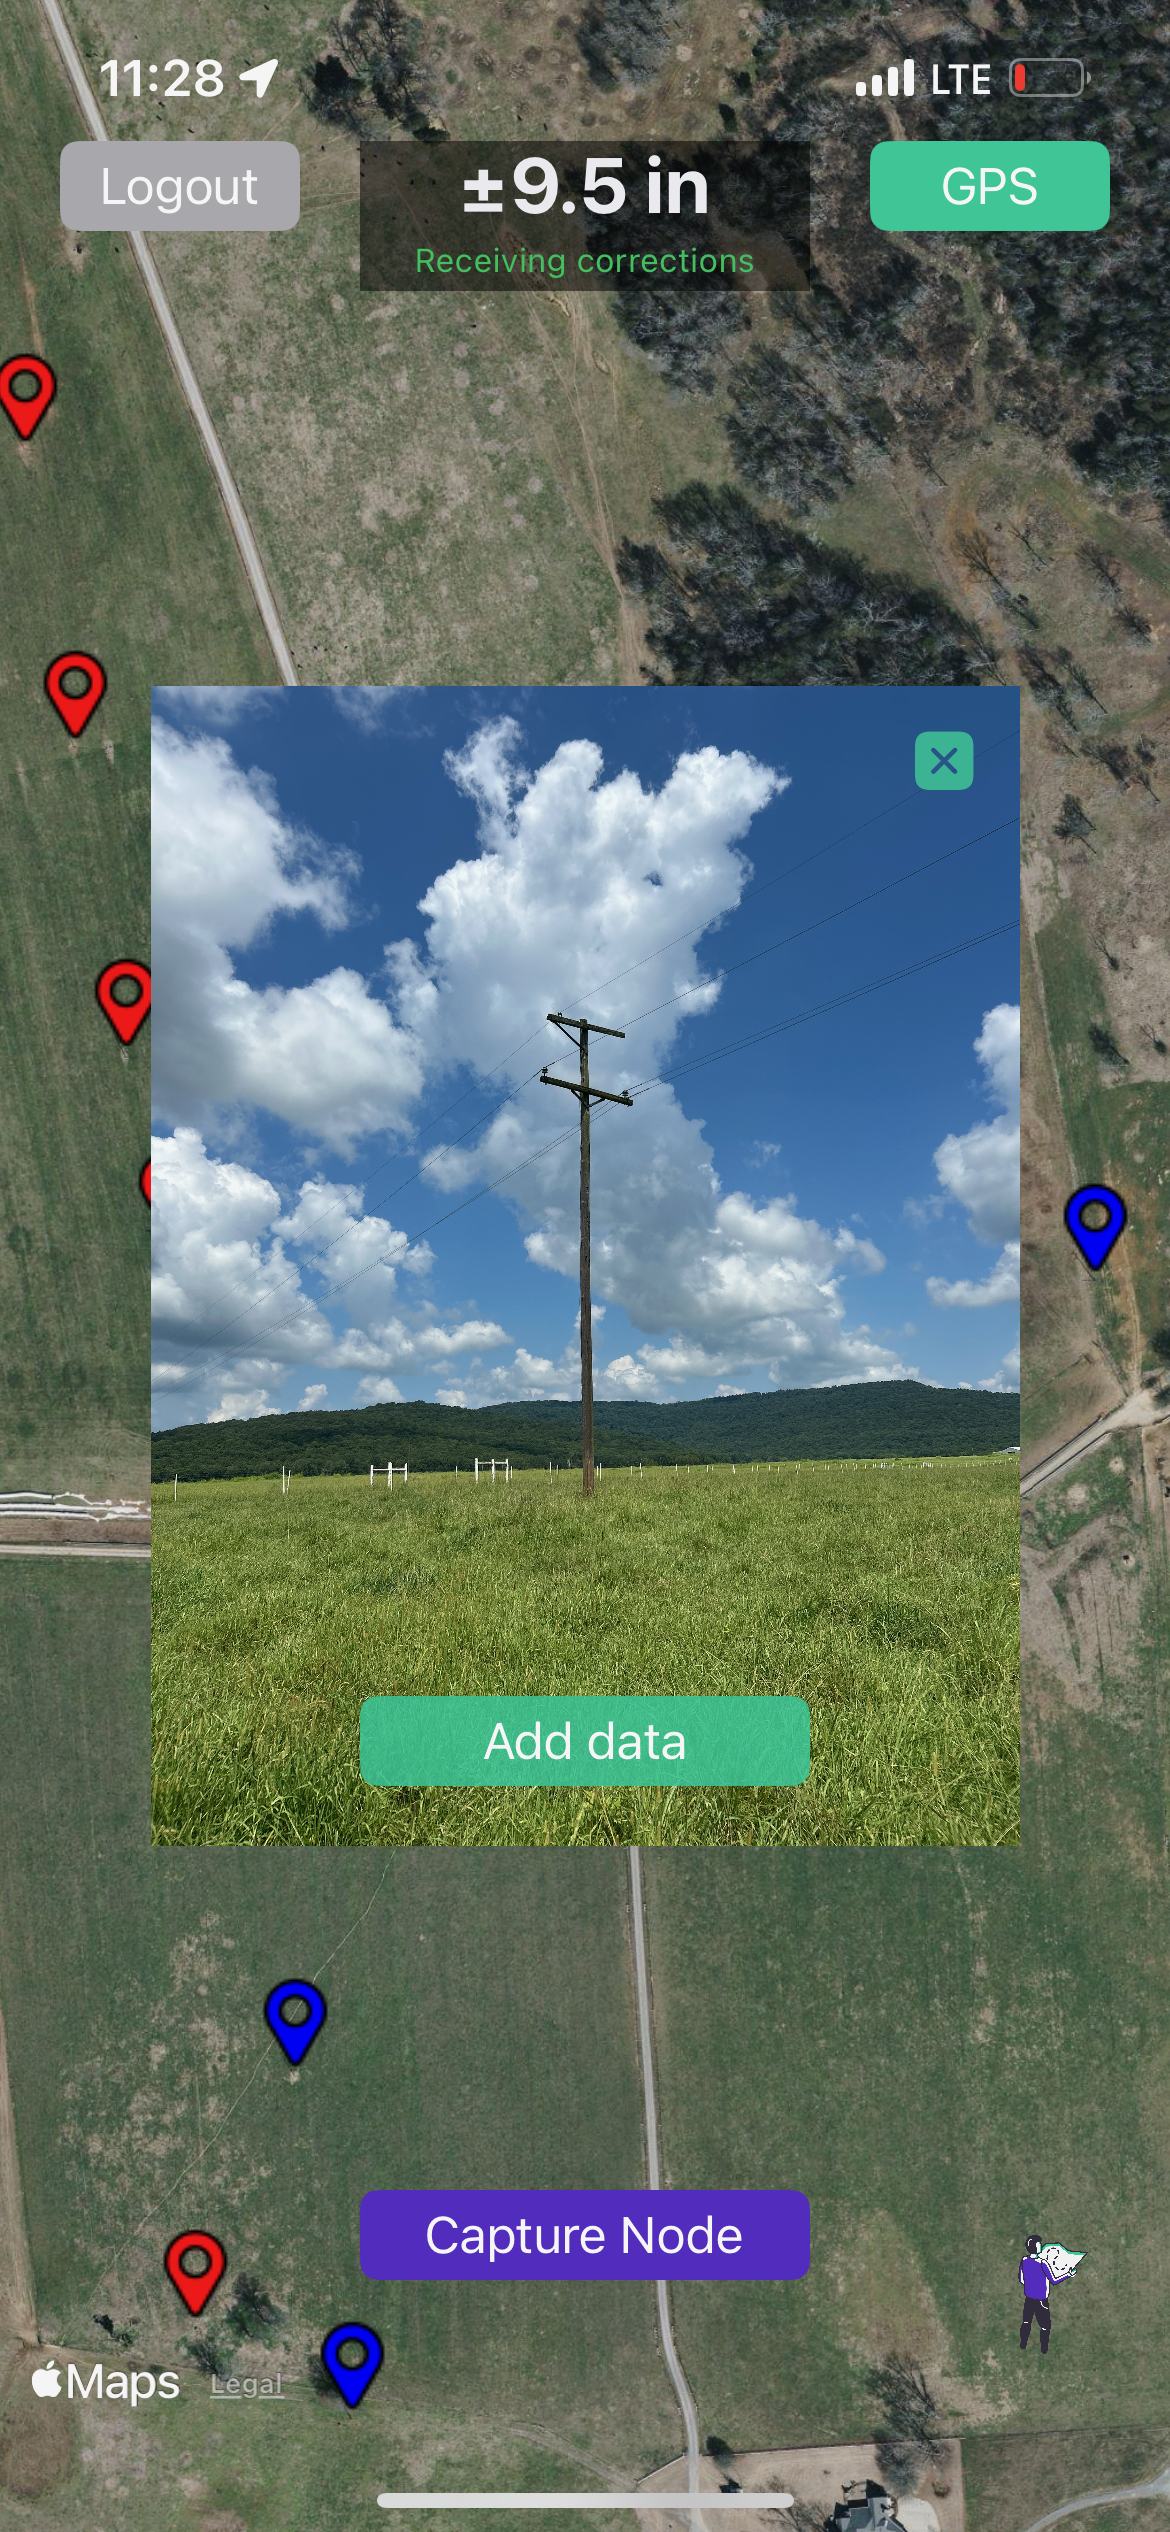
Immediately after taking the node photo, you’ll see the “Add Data” button. This step enriches the record and helps downstream users during review and measurement.
Supplemental Data Steps
If you do not wish to add supplemental data:
- Simply press "Add data."
- Tap "Save."
Your node is now saved to Azmyth.
If you do wish to add supplemental data:
- Tap “Add Data.”
- Capture extra photos such as:
- Equipment close-ups
- Asset numbers or barcode/QR labels
- Backside of the pole
- Clearance obstructions
- Add any relevant notes or attributes, such as:
- Structure ID or pole tag
- Location notes
- Asset owner information
- Special conditions (leaning, damaged components, vegetation issues)
- Tap Save.
All supplemental photos and notes will appear in the Azmyth web app alongside the main node photo.
3. Capture the Node Position (Using the Staff)
Next, you will collect the precise GPS location of the node using the RTK receiver mounted on the staff.
Position Capture Steps
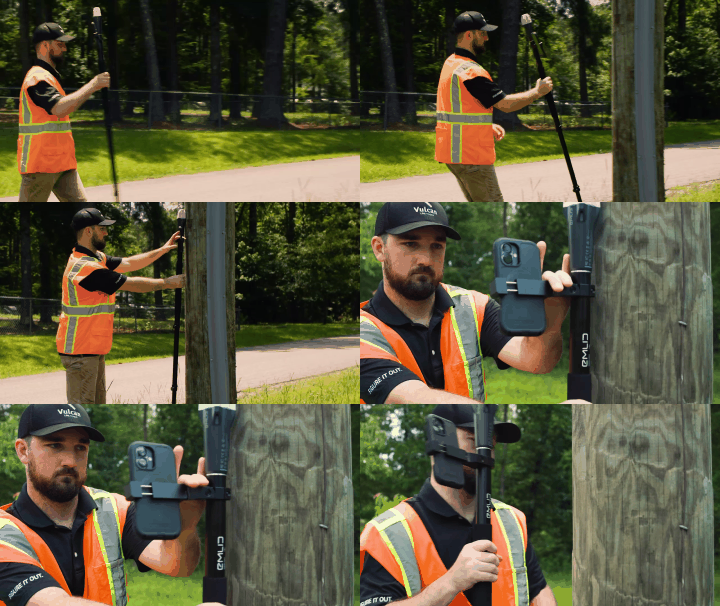
- Walk up to the pole/node you just photographed.
- Place the staff in direct contact with the node:
- For poles: press the GNSS receiver against the face of the pole, at the same vertical reference you used in the main photo.
- For non-poles (anchors, fire-hydrants, etc.): place the receiver's pole on top of or as close as you can to the node.
- In the app, tap “Capture Node.”
- Azmyth uses this precise RTK fix as the anchor point for all height and clearance calculations.
Positioning Best Practices
- Keep the staff vertical during capture.
- Ensure the GNSS receiver has a fixed solution before capturing.
- If the app displays degraded accuracy, wait a moment for RTK to stabilize.
4. If node position cannot be captured
If you are unable to capture the node position for any reason (cannot physically reach it, bad GNSS data, etc.), follow these steps:
- Position yourself as close as you can to the node.
- In the app, tap "Capture Node."
This position will pair to the node image, and you can edit the location later in desktop Azmyth. This is helpful when you cannot capture the precise location of a node as desired but still need an estimate. Details on this step can be found in Measure.
5. Uploading Your Data
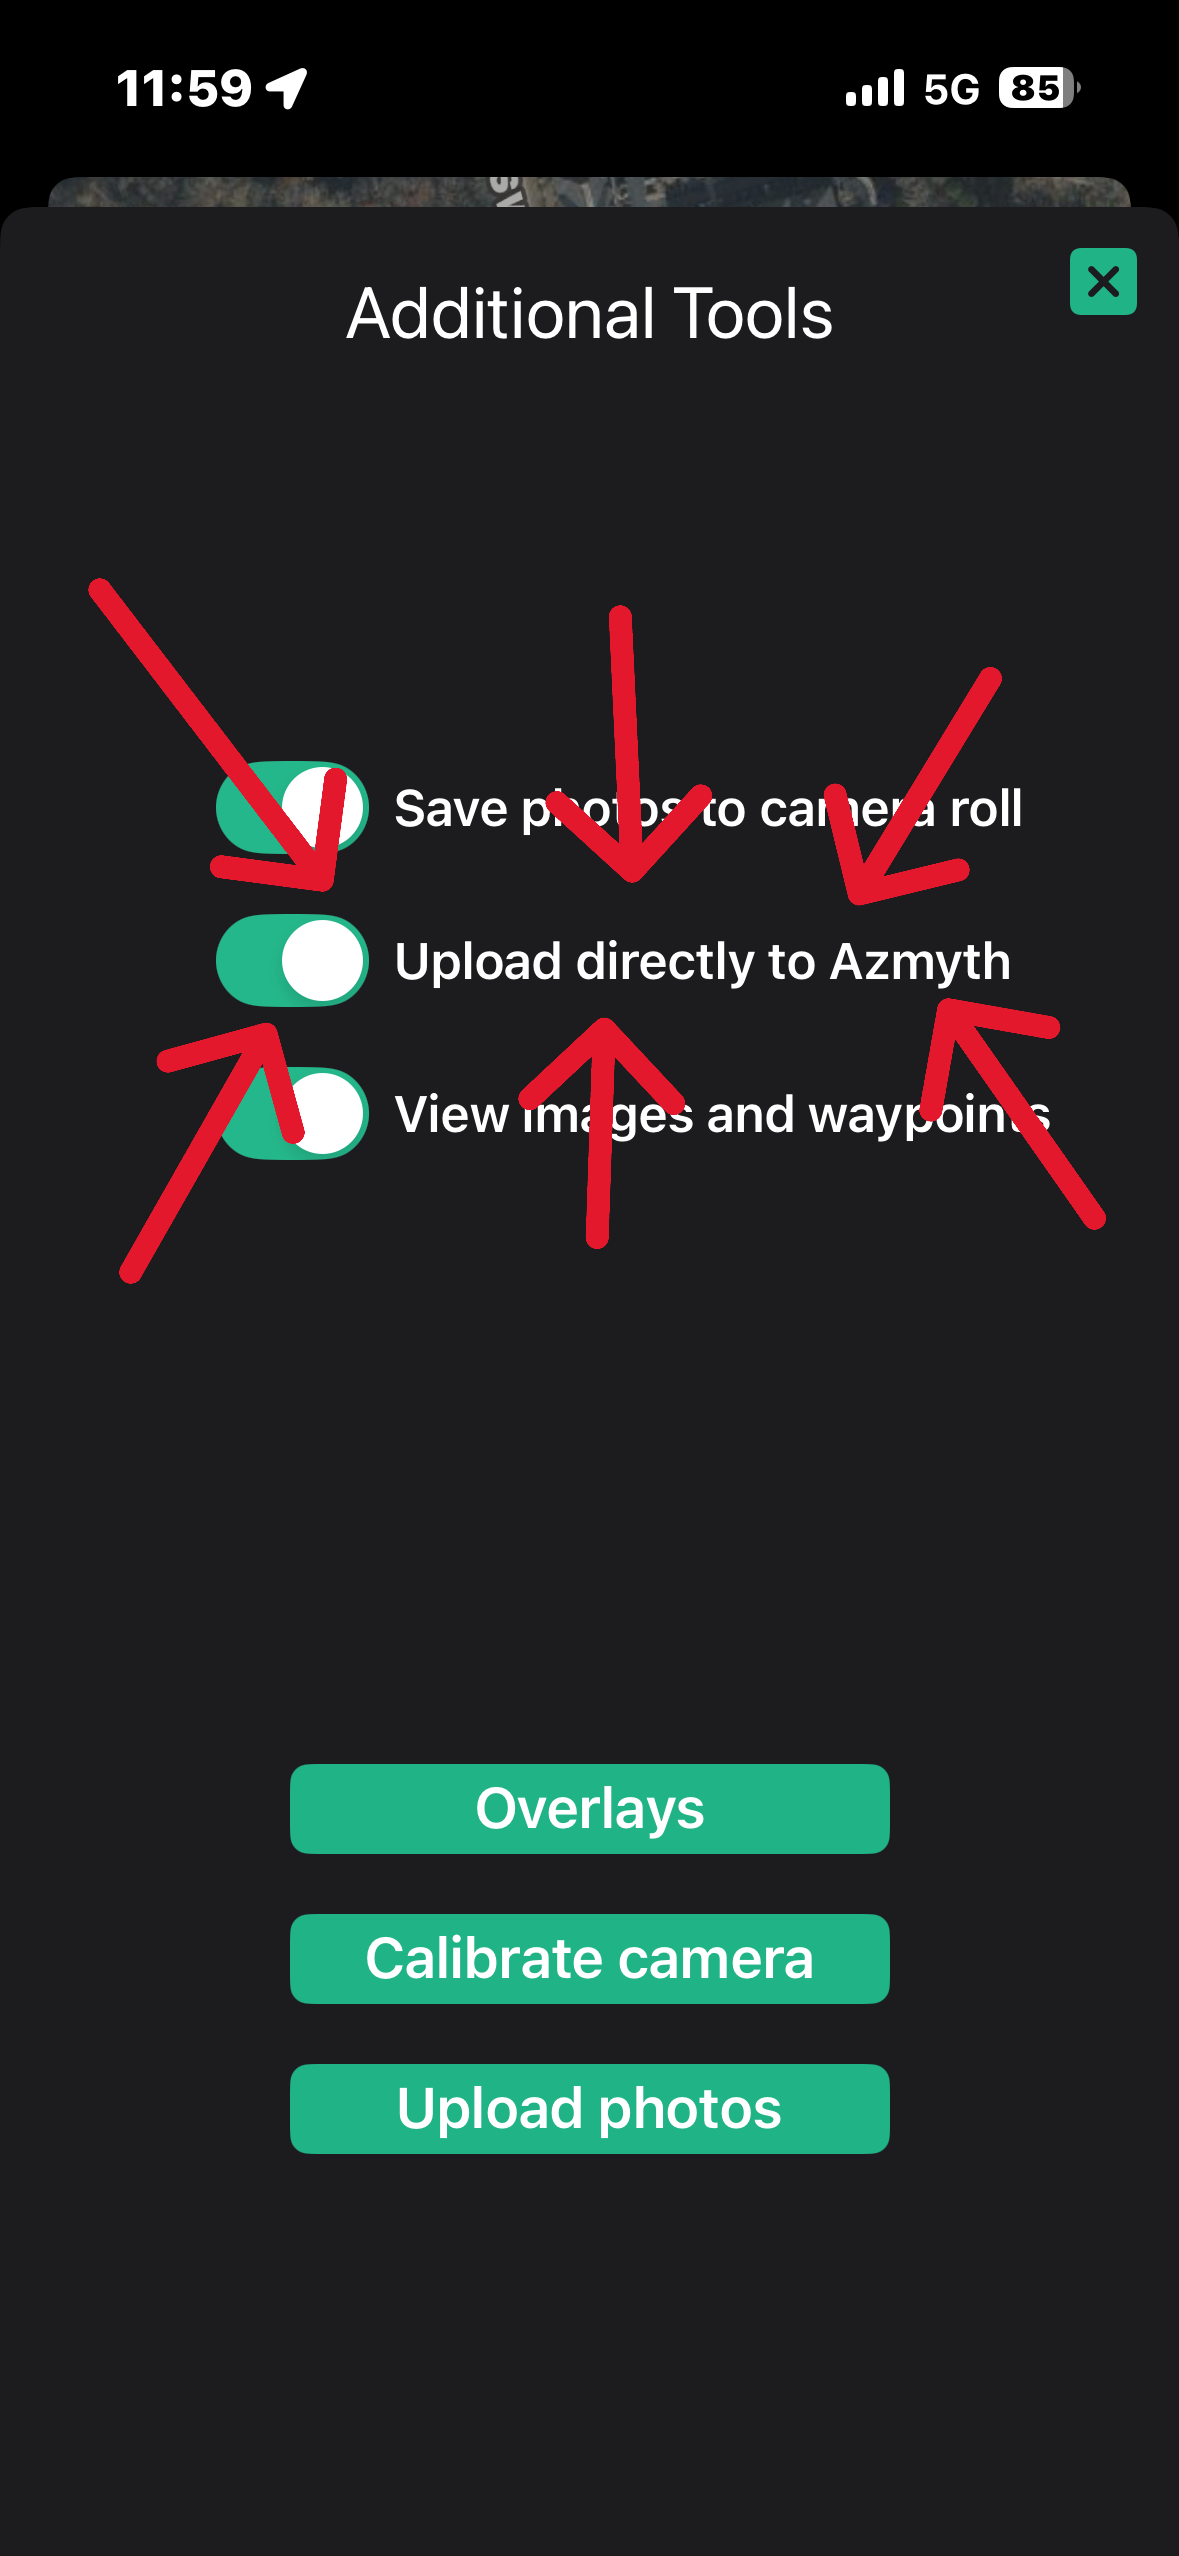
If Auto-Upload is enabled:
- All photos, data, and node positions will upload automatically to the Azmyth web app when you have a stable internet connection. If Auto-Upload is disabled:
- Everything is stored locally on the device.
- You can upload captured nodes later when connected to Wi-Fi or cellular data.